
Easter 2016 - God is Here Today
Service Video
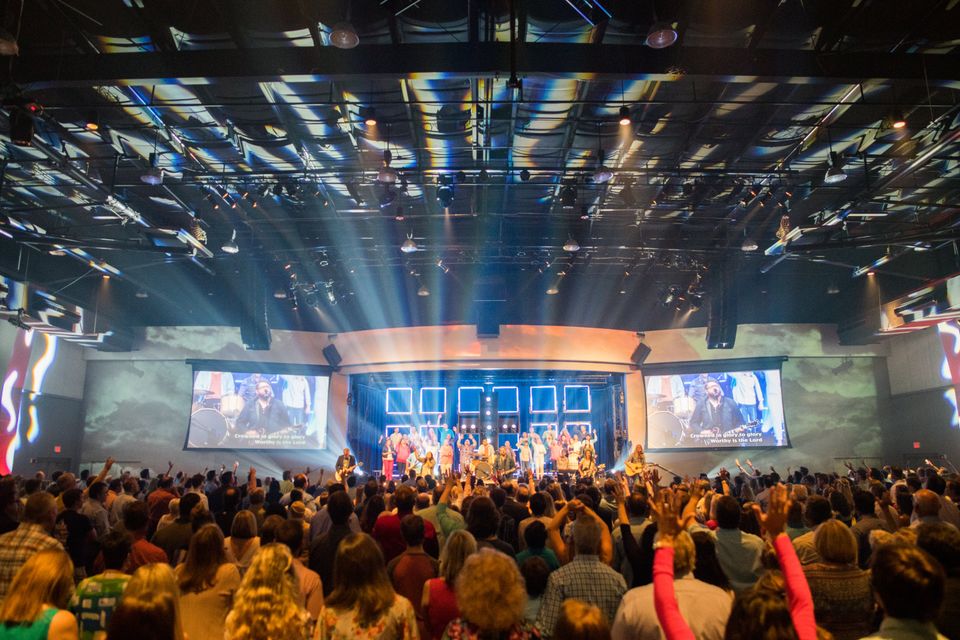
The idea for the set was simply a kabuki drop to reveal a choir-like setting and to make the cross a prominent piece of the set with a vibrant lighting based background.
My roles were:
Set Design, Lighting Design, LED Design and Implementation, Video Implementation, Rigging, Audio Design, Direction, Producing etc.

Picture Gallery
Set Details
-
We began with three main elements: 1. We wanted a standout background element
We began with three main elements:
2. We wanted the cross to be prominent whether it be in quantity or size etc.
3. We wanted to do a reveal of a large group of singers -
1. Standout Background Element The background consists of 18 square panels with 4' of LED tape on each side. Each side is individually controlled by an dmx controller/decoder. On the background we used 5-30amp 12v power supplies feeding 9 DMX Decoders. Each DMX Decoder has 8 outputs at a max of 2.5amps per output. So basically there was a controller/decoder for every two panels.
1. Standout Background Element
The panels were built out of 1x4 and we used 1x4 as bracing on the back. We then painted the frames brown. The top two rows of panels are 4'x4' and the bottom row is 2'x4'. -
2. Promenant Cross We wanted the cross to be prominent in the set so we decided to go with one central extremely large cross.
2. Promenant Cross
In order to get maximum flexibility out of using the cross I decided to make it a significant width at 33" across so that we could project imagery on it at specific times in the service. The frame was made of 2x12 and the surface was covered with Luan. Likewise the back side was built with wire shelves in order to hold Robe 100 lighting fixtures in the shape of a cross.
The Cross was fitted at the bottom with a piece of all-thread that matched a hole drilled into the stage floor and likewise at the top a piece of all-thread was an anchor with a clamp to a pipe overhead as a stay. In order to spin the cross in place quietly before the message during the prayer and then during the last song we installed ball bearings on the bottom of the cross. -
3. The Reveal We wanted to do a reveal of a group of singers during the opening song. So we decided to go with a cyc that was projected on in order to make it appear as though it was on purpose. We in fact put the cyc in place the week prior on Psalm Sunday to add to the feeling that it was supposed to be there. We used a kabuki system rented from Rosebrand.
3. The Reveal
The Cyc had been sitting in storage since a stage upgrade in 2011 and so it was nice to have a cyc at no additional cost. The Kabuki was 30' in length to cover a 36' opening...so we had to get creative with our side wings before the service in order to not give away the reveal. We added the truss to the sides and created a swinging curtain hanger to be moved out of the way once the drop happened and no more blackout curtain was needed.
One other consideration of doing the kabuki reveal was the reset of the stage between services in a fashion that was seamless to the attendee. We didn't want the folks coming in for the next service to have the moment ruined by seeing behind the curtain...but also knew that our turnaround between services was tight enough that there was not an opportunity to hold doors.
To that end we understood that we had about 3min to reset given the amount of time it takes to exit a full room. The Rosebrand solution fit the bill perfectly. If we had used a similar solenoid solution our reset and recheck would have taken closer to 20min. With the Rosebrand solution there were posts all along a small pipe that was fixed in a fashion that was tilted up. Those posts were adjustable left to right to fit the grommets on whatever material the user provides. It took approx. 20min to mount all the hardware to the truss, 10min to adjust the posts to the grommet fittings after marking both cyc and the kabuki system with a centerline for reference we began the hanging process. We used three 1/4ton motors above raising 30' of 12"x12" black truss to fly it.
The system was so effective the first time we did a drop we timed ourselves...with no practice it took us 1min & 15sec to bring the truss down...reset the bar...rehang the cyc and put the truss back into correct vertical position.
We had planned on putting 6 people on the stage for the reset but with 2 people doing a 1min reset we had no issues whatsoever.